CDS Global - How to install the Global Scanner software
Updated: 10/08/2026
Article #: 376
Below are instructions. Download the both zip files. Make sure to unzip the RangerForaSmarPVA [version number] so that you get the .exe version, which you will need because it is the application.
1) Do this as a local admin ex: thqadmin
9) Launch the application again, updates should be complete with a gray bar at the bottom
10) Click on the Login button and have the user enter their CDLS Global credentials. They should now be able to scan checks to CDS global.
1) Do this as a local admin ex: thqadmin
2) Install the scanner drivers – run RangerFor*.exe and accept all defaults upon installation
- 3) Plug in the scanner USB and power cables, turn the scanner on, the device manager will prompt you when the scanner drivers are found and successfully installed
- 4) Unzip the CDSGlobalRDC.zip file
- This will unzip to its own folder: CDGlobalRDC
- Validate the zip file unzipped to a folder containing several files and folders
- Move the newly unzipped folder to:
- C:\Program Files (x86)\ for 64 bit operating systems OR
- C:\Program Files\ for 32 bit operating systems
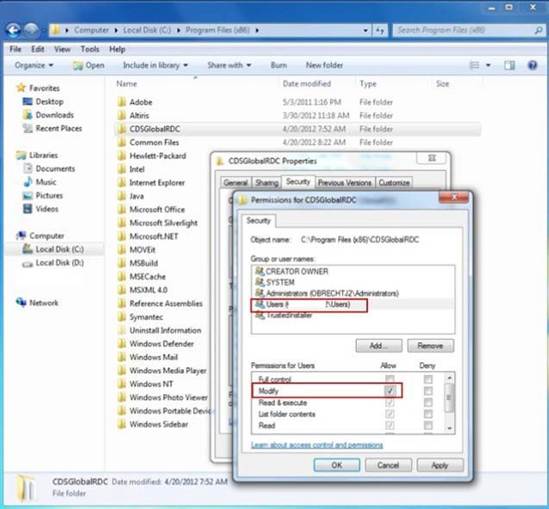
- 5) Grant user(s) of the PC modify rights to the CDSGlobalRDC folder
- Right click on the CDSGlobalRDC folder within the Program Files folder and select properties
- Click on the security tab
- In the group or user names box – click on Users and then click the Edit button
- Again select Users in the Group or user names box
- Check the Allow Modify box
- Click Ok to exit the dialogs
- 5) Open the CDSGlobalRDC folder within the Program Files (x86) folder
- Right click on CDSRemoteScan.exe and create a shortcut
- Copy and paste this shortcut to the desktop for all of your users to C:\Users\[name of user]\ Desktop
- 6) Login back as the user and launch the new shortcut on the desktop
- Log into the scanning application by clicking the login button at the bottom left of the window and entering your email address and password when prompted
- Log into the scanning application by clicking the login button at the bottom left of the window and entering your email address and password when prompted
- 7) The scanning application will now perform any updates needed (after step 7 you may be able skip to step 10 if there are no missing files)
- A missing file or new file error may be prompted with a blue bar at the bottom
- Click Ok and exit the program
- Copy any dll’s and/or one site specific import file from the Update folder within the CDSGlobalRDC folder to the main CDSGlobalRDC folder
Launch the application again, updates should be complete with a gray bar at the bottom 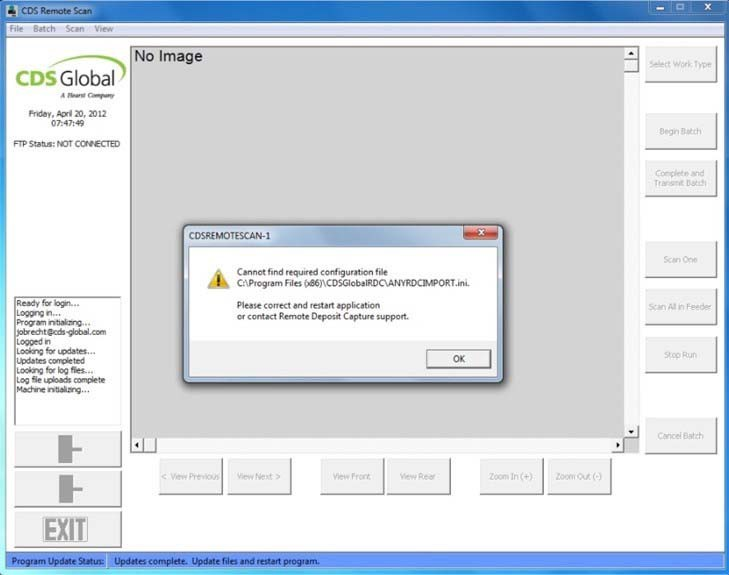
- 8) A new program found message may be prompted with a green bar at the bottom
- Exit and relaunch the application, updates should be complete with a gray bar at the bottom
- A missing file or new file error may be prompted with a blue bar at the bottom
9) Launch the application again, updates should be complete with a gray bar at the bottom
10) Click on the Login button and have the user enter their CDLS Global credentials. They should now be able to scan checks to CDS global.
|
Rate this Topic:
|
|||
|
